Essential Question: What techniques can I use to successfully translate my sketch to a digital image using Illustrator? What tools does the program have to help achieve the level of craftsmanship I want?
Today we will continue to create digital versions of our tattoo sketches in Illustrator. We will talk about craftsmanship and how to achieve that using both the pen tool and the smooth tool. We will also discuss different shading techniques that we can use to add dimension to our illustrations.
Project Reminders:
- 5×10, you choose the orientation
- Only use the Pen Tool
- Limited color scheme
- 2/3 colors max
- Think about how this will look on your skin
Shading Techniques:
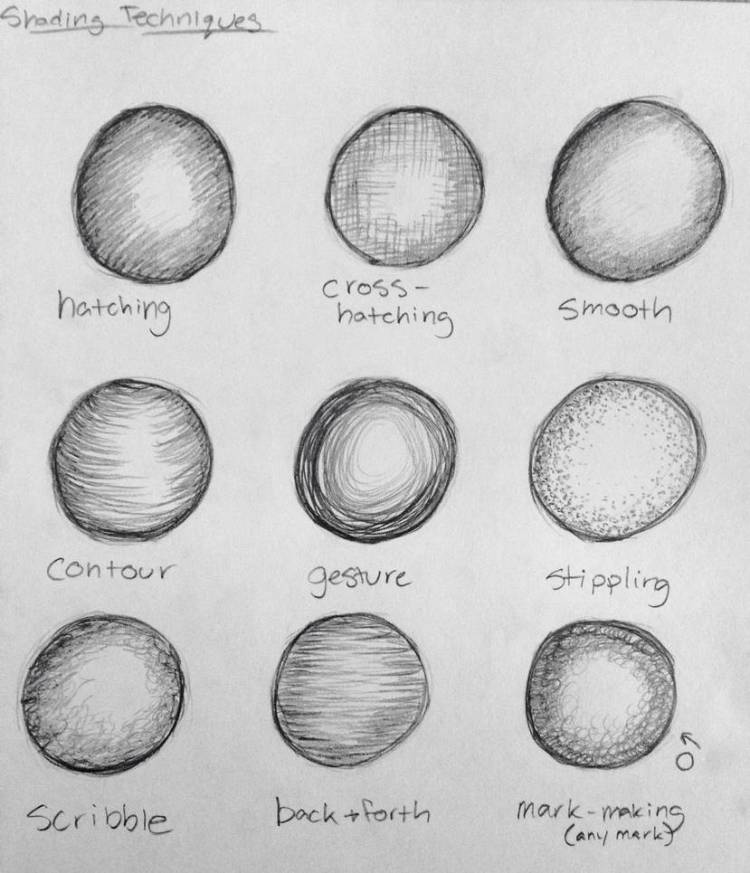
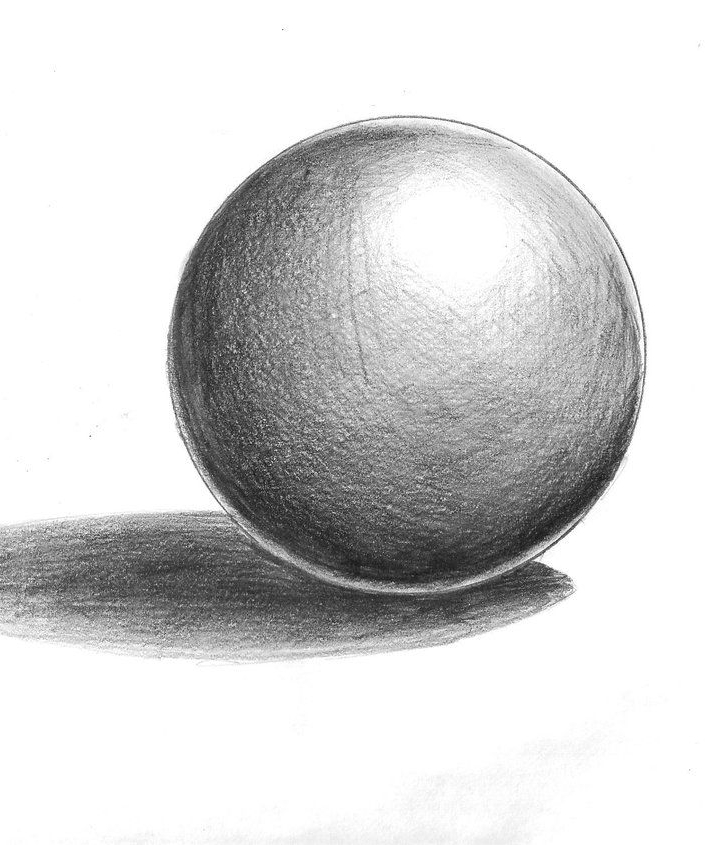
In Illustrator and vector images, there are different ways you can create dimension that build off of traditional shading techniques you already know how to use when drawing.

Line or different block/shapes can add dimension to our projects similar to how we would create them in pencil drawings.
Smooth Tool
A tool that will help you achieve a higher level of craftsmanship is the smooth tool. The smooth tool will allow you to smooth the appearance of your lines/paths by removing extra anchor points.


To use the smooth tool, select the line/path you want to smooth.

Select the smooth tool but press and holding the shaper tool until a drop down menu will appear with the smooth tool.

Draw over the points on the path in the area you want to smooth.

Today we will:
- Discuss the different ways we can add shading in Photoshop.
- Talk about what a good color scheme looks like
- Learn about the pen tool and how it can improve our projects.
- Continue to sketch out our tattoo designs in Illustrator using a 5×10 artboard.
- Make a blog post that answers the following questions:
- Have you used the smooth tool? If so, how has it improved your design?
- What is your plan for color? Will you be using it and what is the color scheme?
- What is your plan for how you are you going to finish your design before we start animating?
