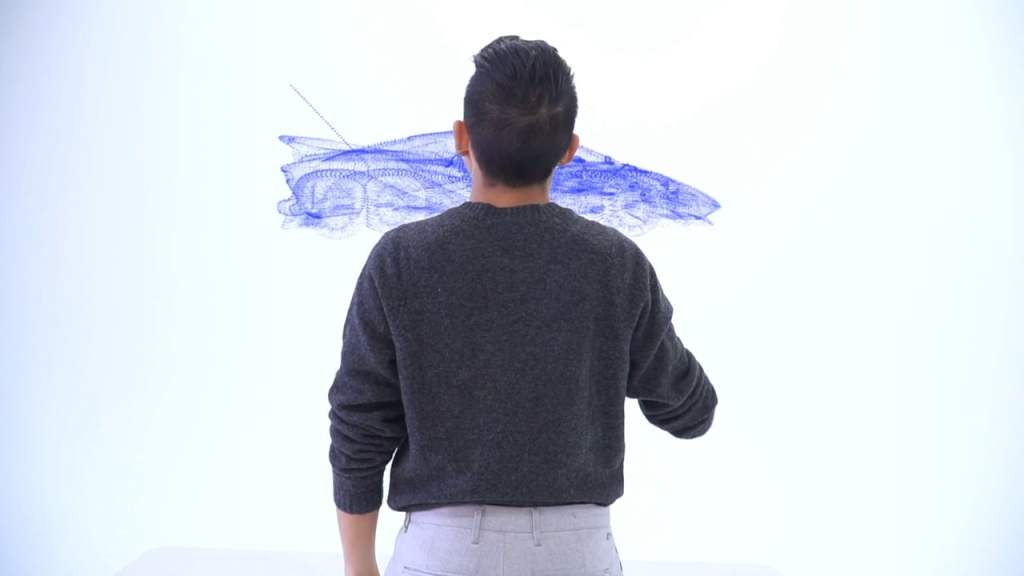
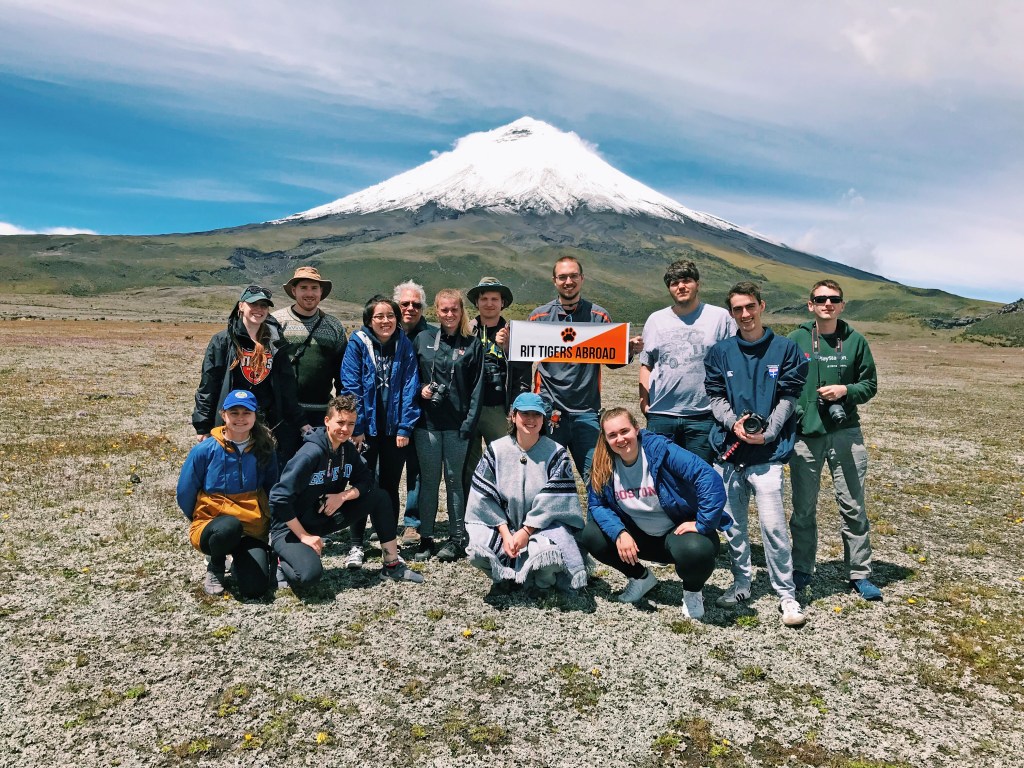
A lot of you have asked me a lot of questions about college and what it’s like to go to RIT. In this post I will show you some of the work my friends and I did in New Media Design, as well as talk a little bit about college life outside of class
What is New Media Design?
New Media Designers are people who design a large variety of products, most of them digital. The can create designs for the web, apps, your phone, as well as commercials, animations, and title sequences.
New media combines User Interface Design, User Experience Design, Motion Graphics, Animation, 3D Modeling and Graphic Design all into one. Most things that you interact with on a daily basis was probably made by a new media designer.
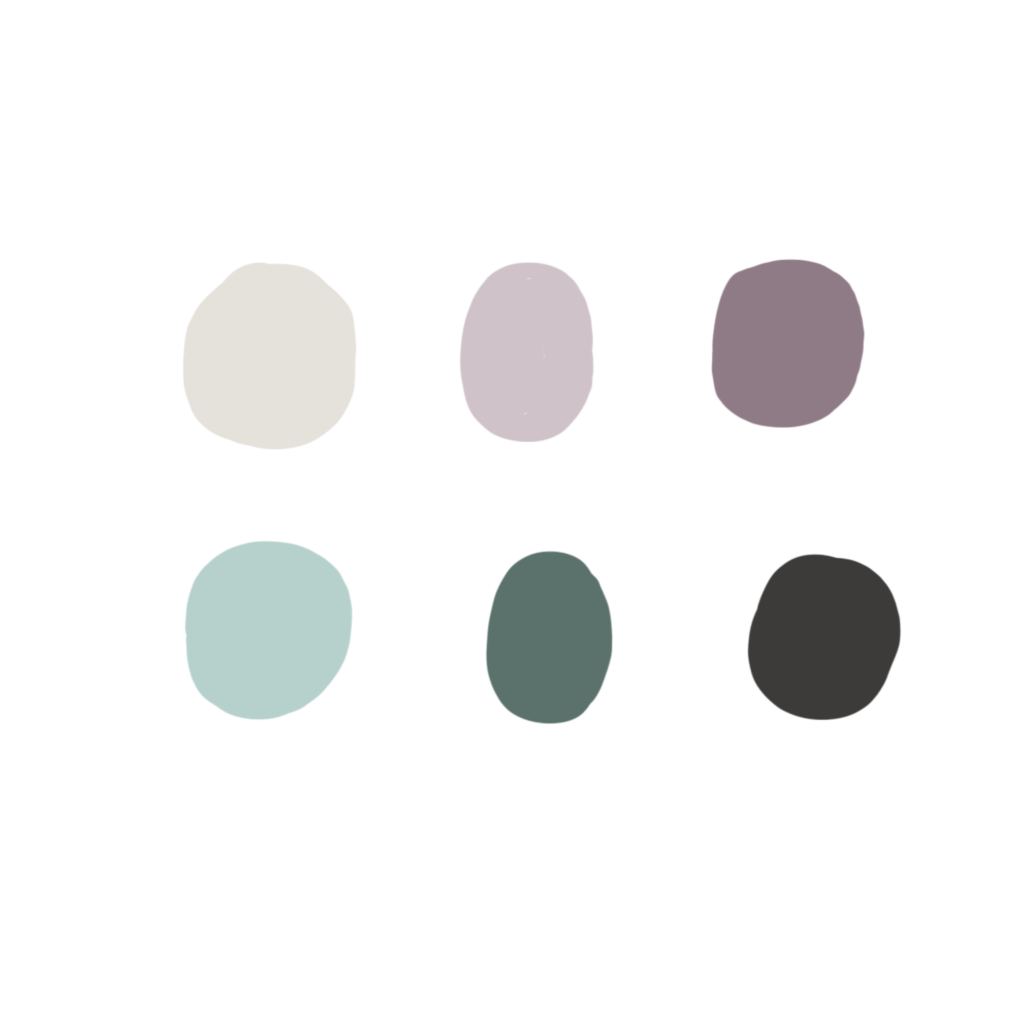
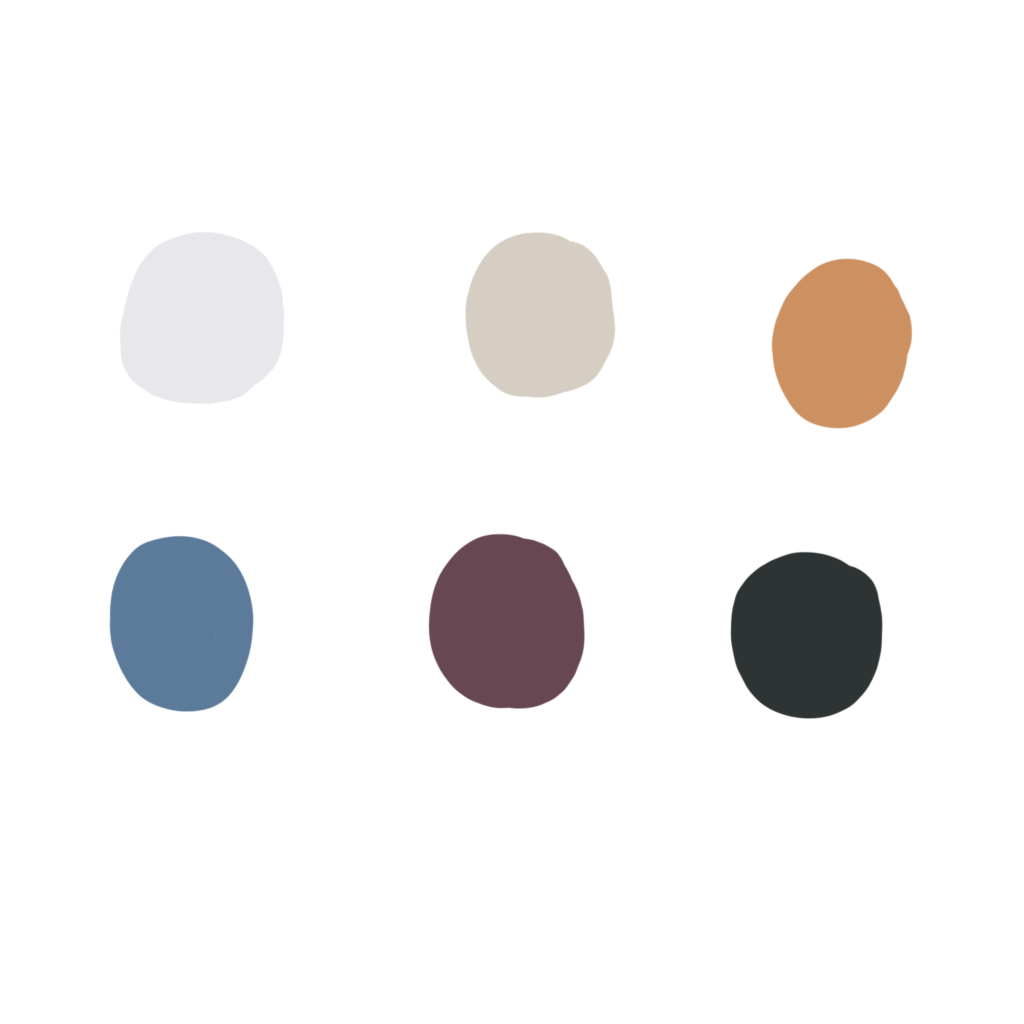
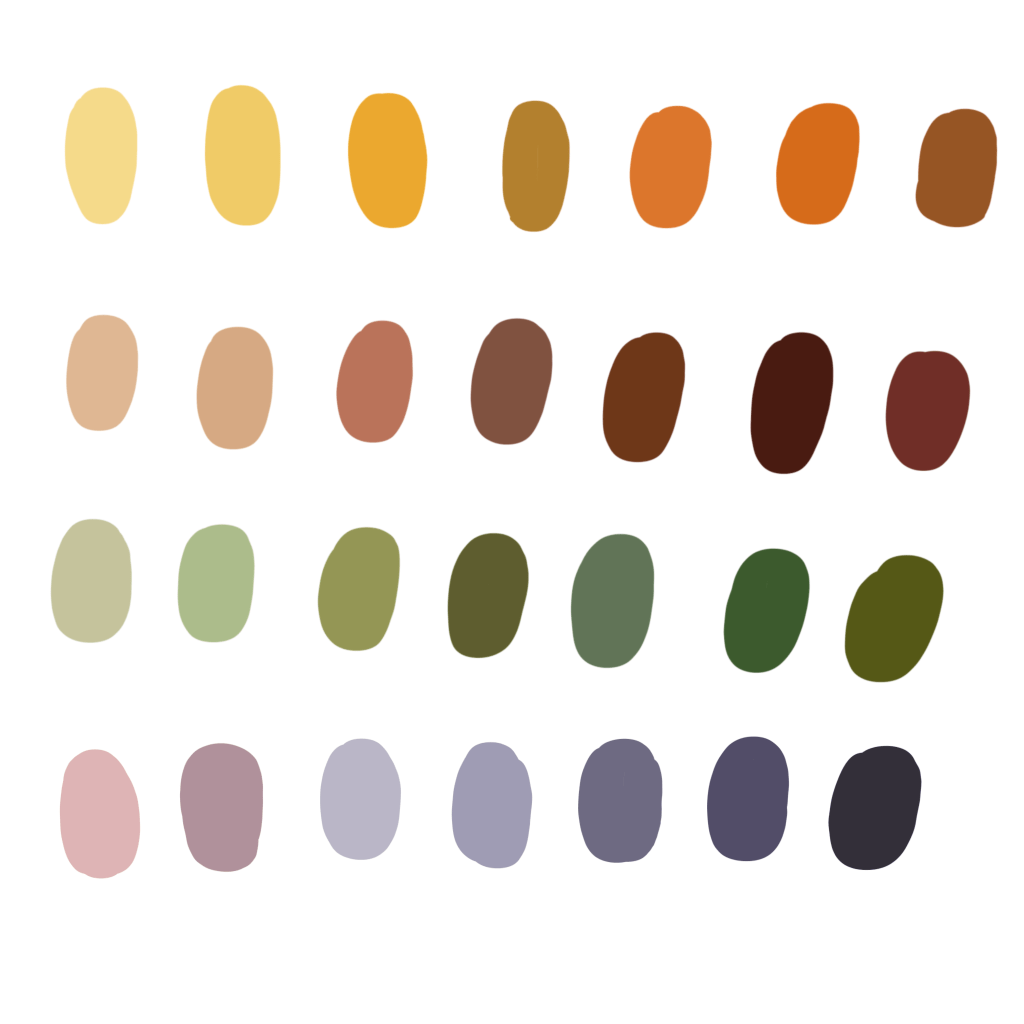
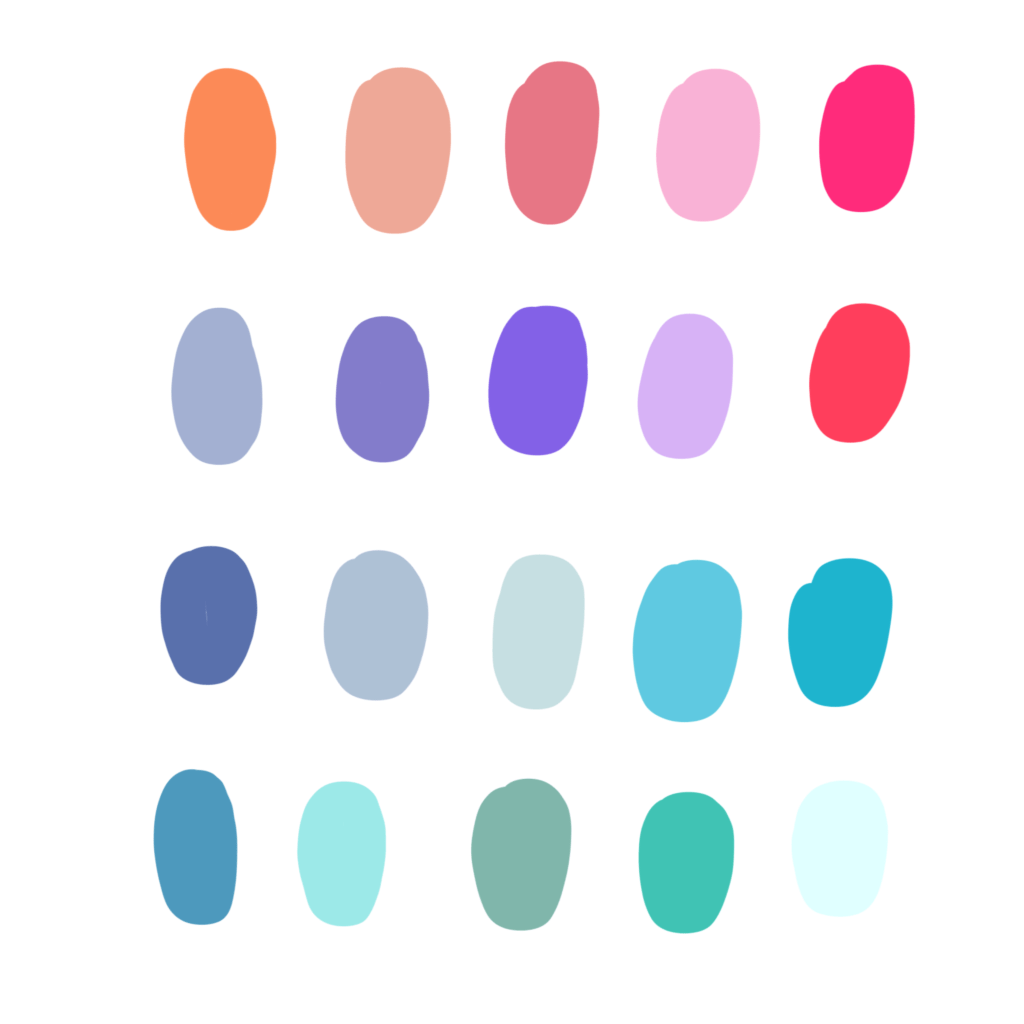
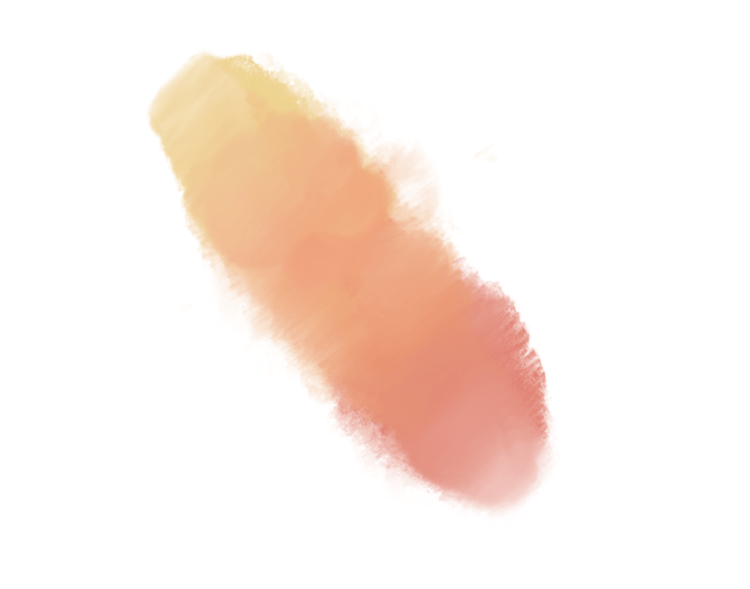
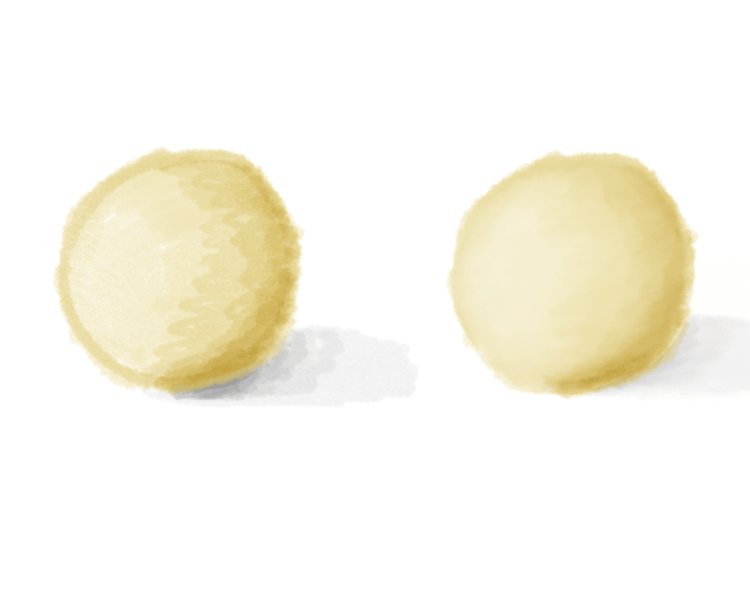
Essential Question: How can I use color palettes to help me achieve a high level of craftsmanship in my illustration?
Today we will continue working on our Illustrative Photography Projects. We will talk about how using color palettes will impact the story we’re telling and how they can be used to help convey our message.
Essential Question: How can I use the tools in Procreate to start drawing a scene around my model that will begin to tell my story?
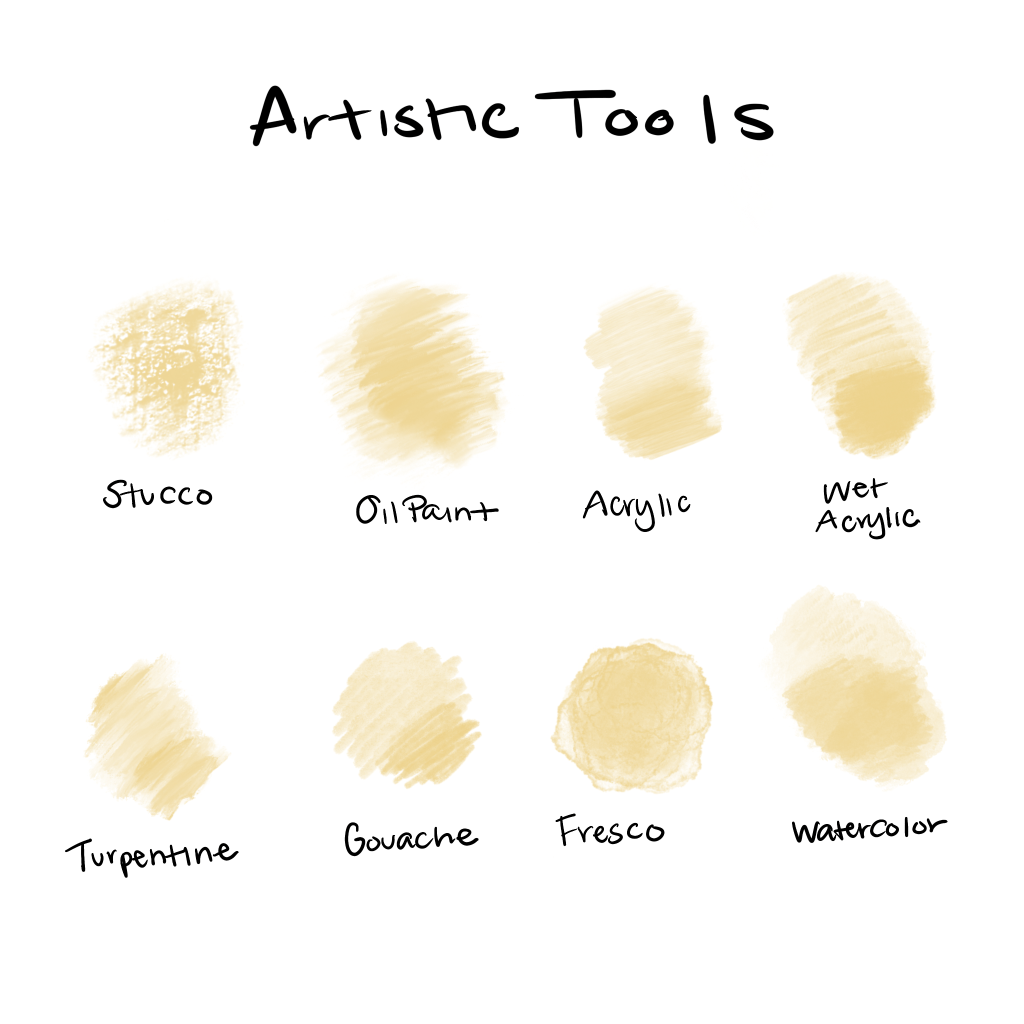
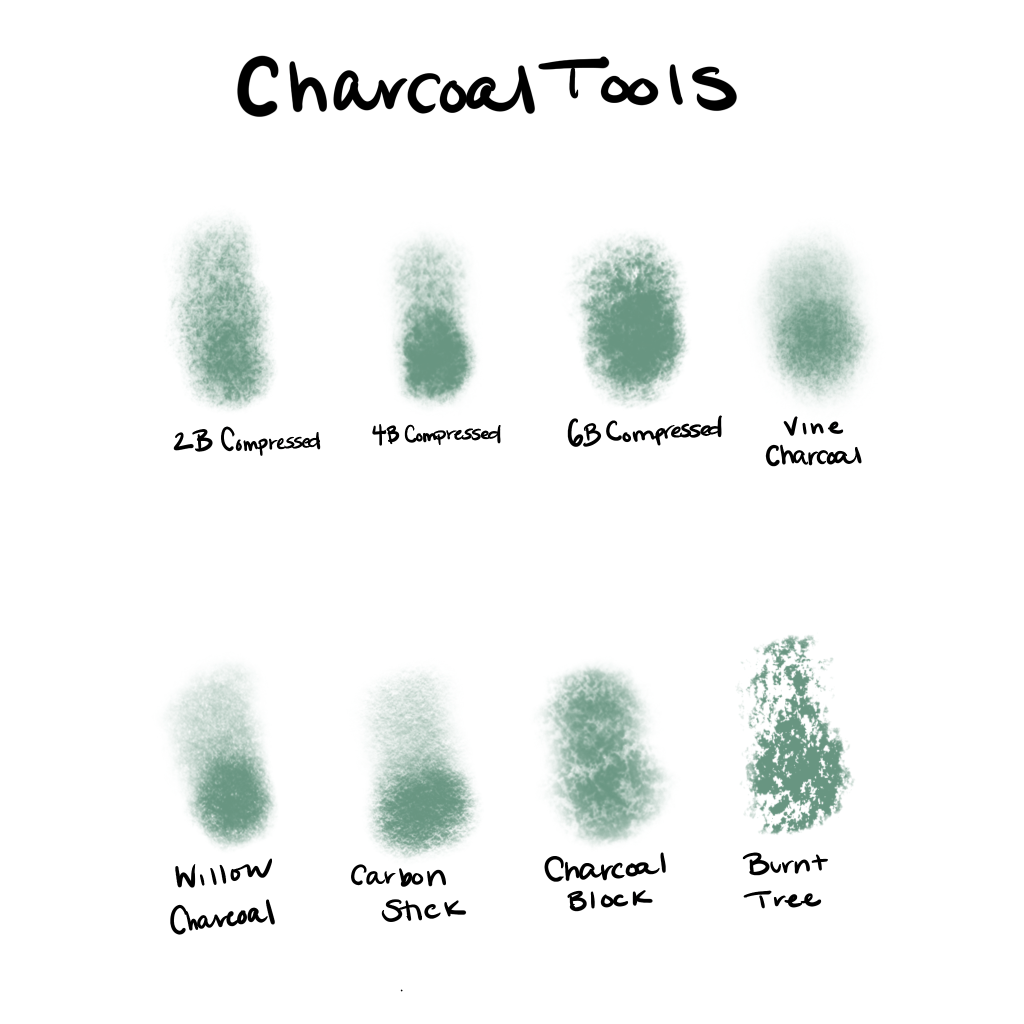
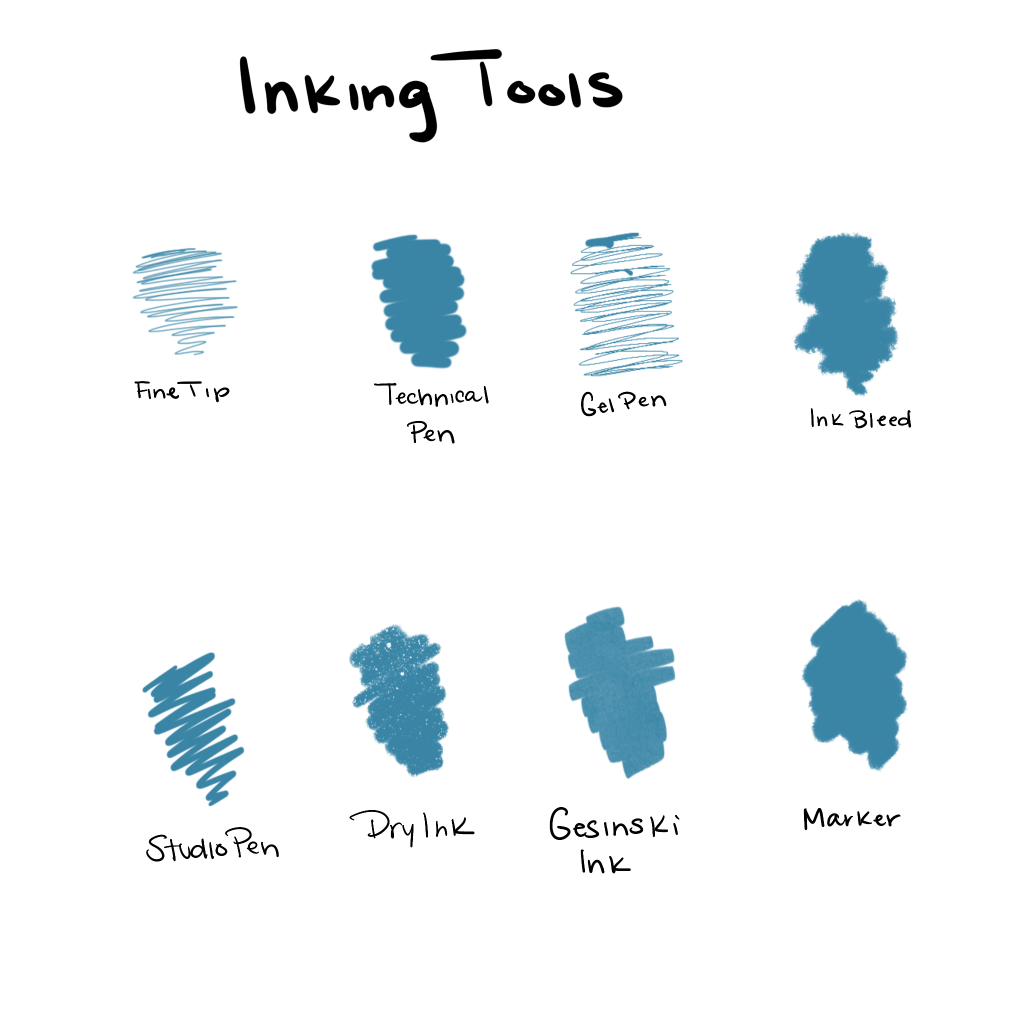
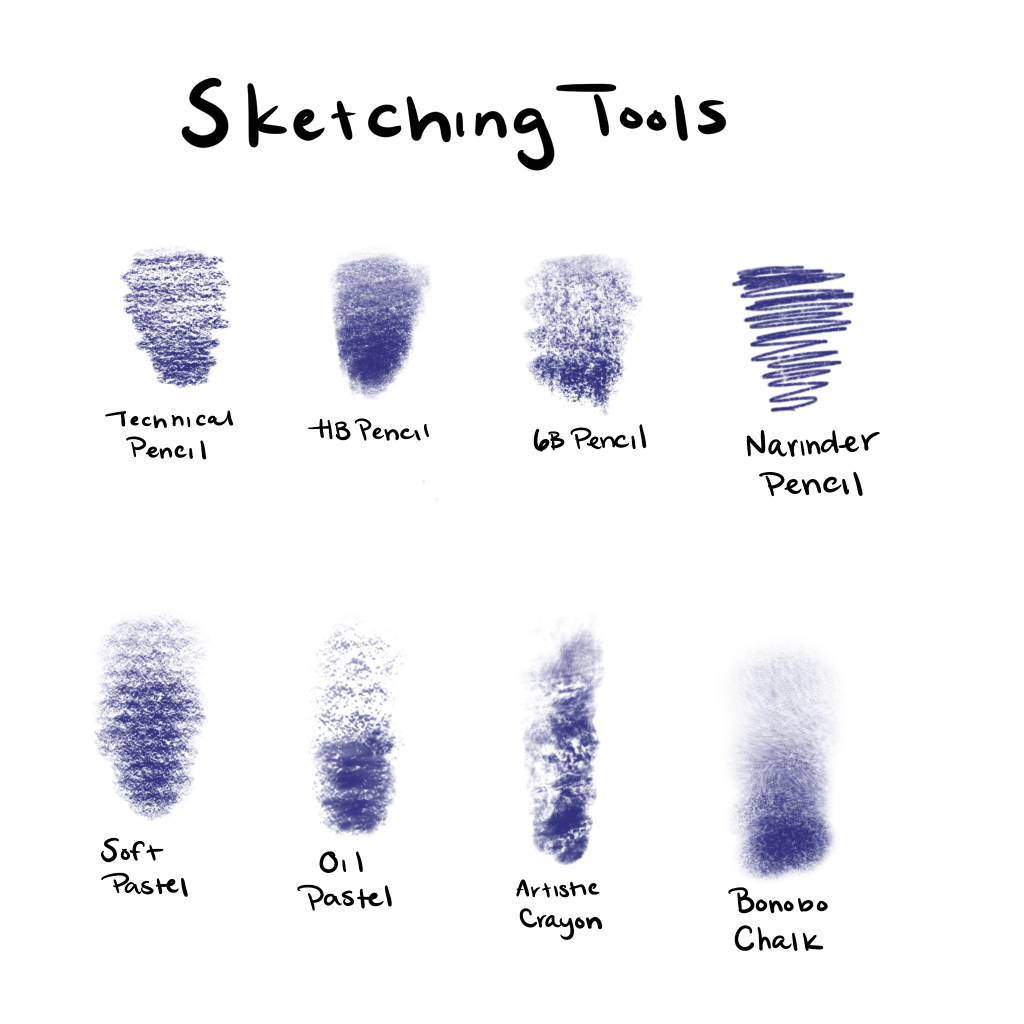
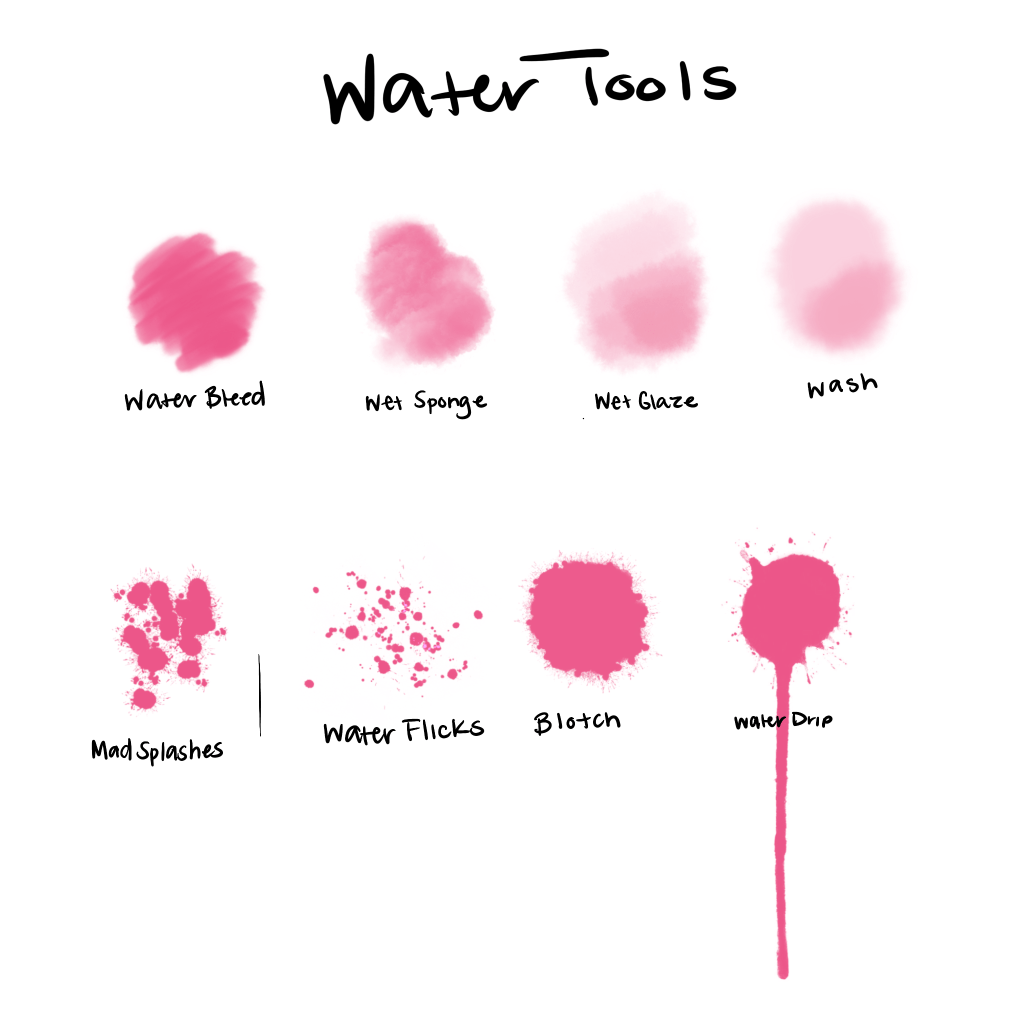
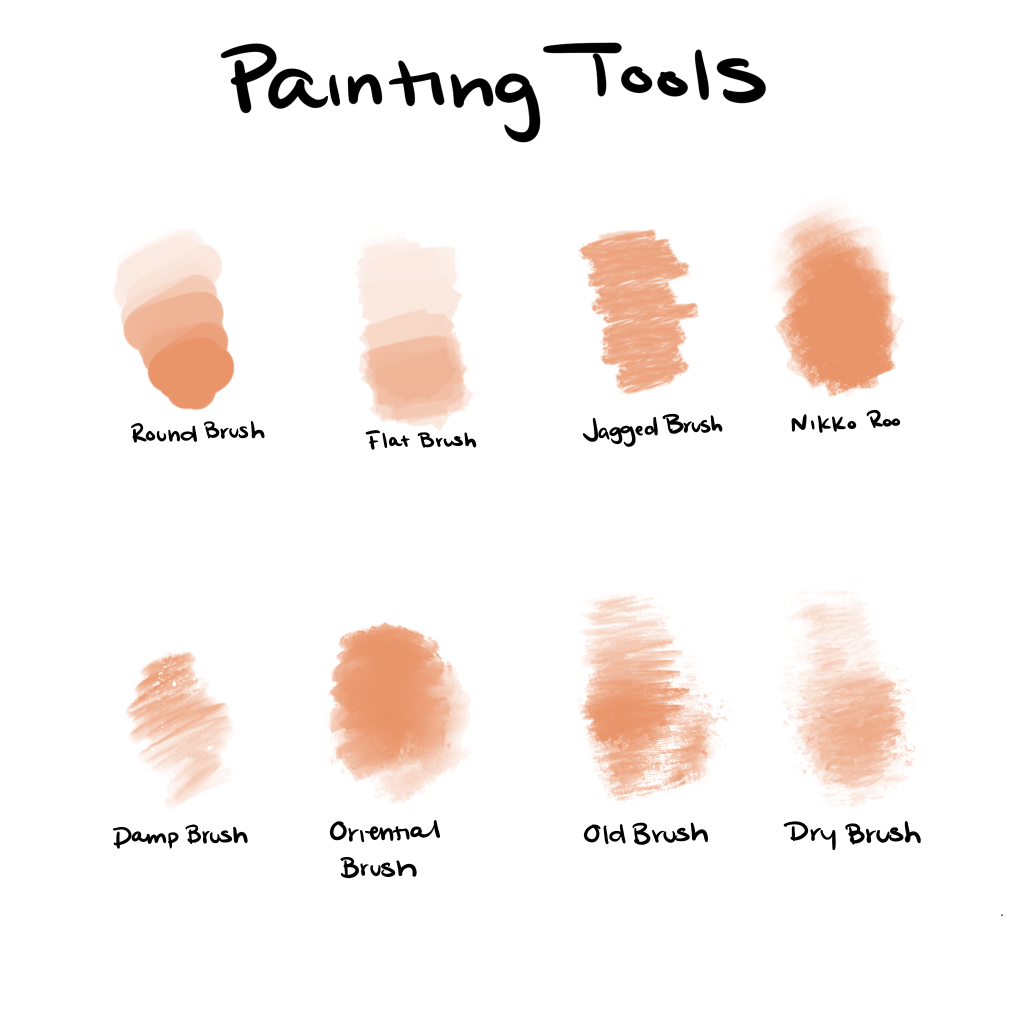
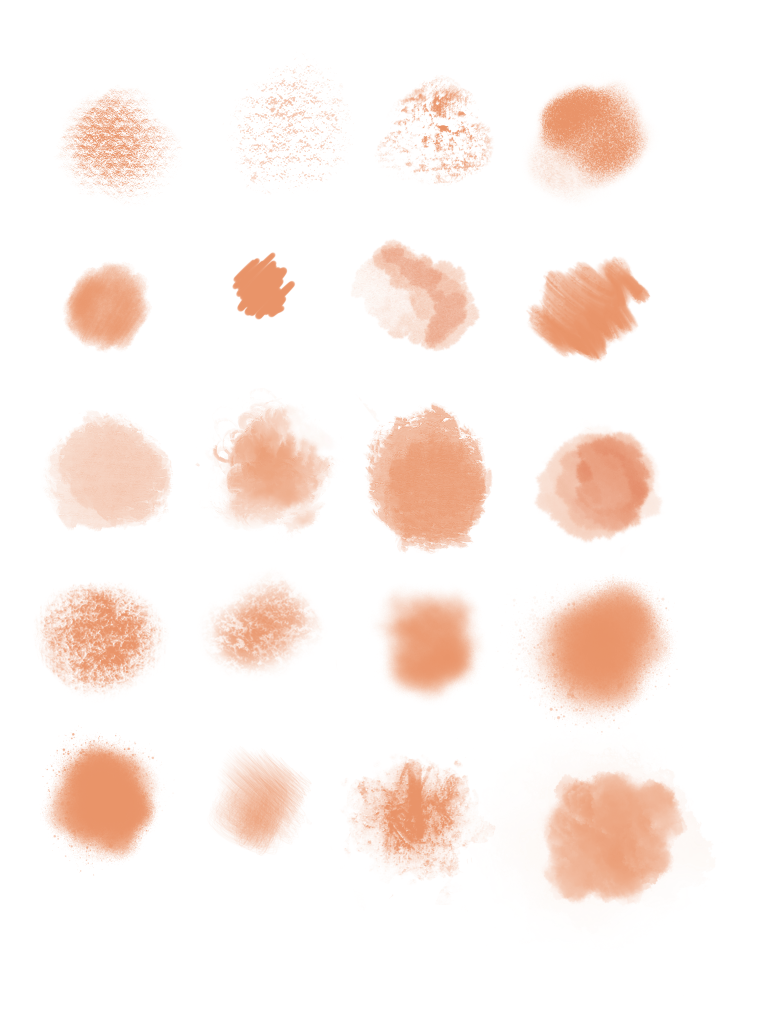
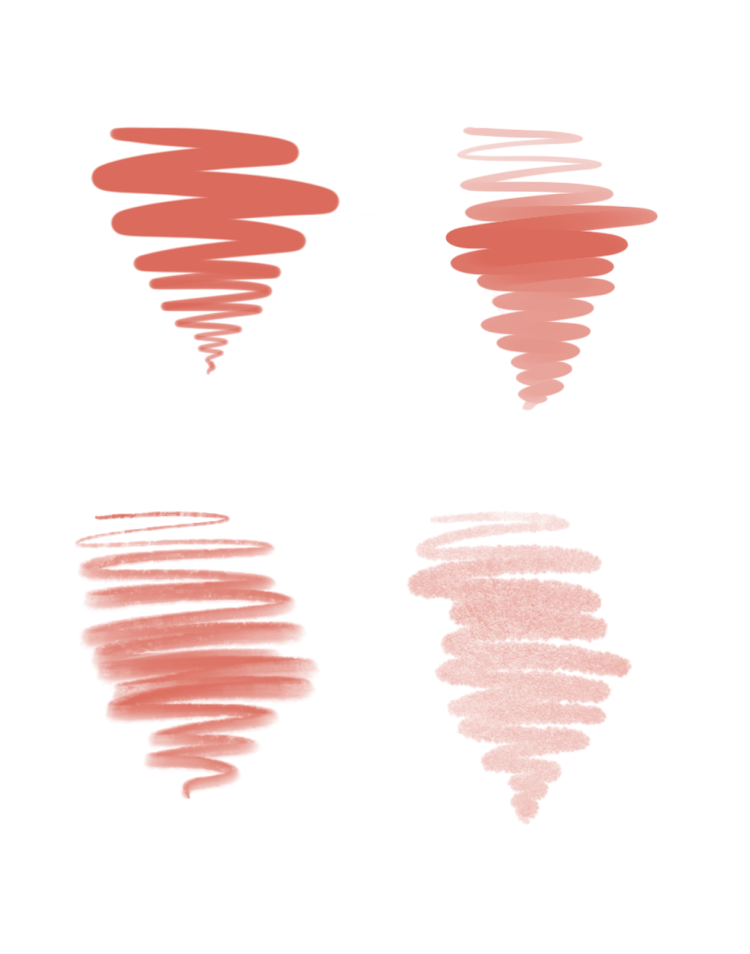
Drawing tools in Procreate
There are multiple different types of drawing tools in procreate that you can use to draw your scene. You can draw in different styles depending on the tools that you choose to use. These will also give your piece an overall feeling that can change based on the tools you used.
Today we will:
Finish cutting out our models in Photoshop if we haven’t already done so
Begin to draw our scene around our model using iPads and Procreate
Make a blog post documenting our progress and answering the following questions:
How would choosing a watercolor brush affect your illustration differently than if you chose another tool like sketching or inking tools?
Why do you believe there’s so many options in tools? What are the benefits? What’s some disadvantages?
What tools do you plan on using in your Illustration? Why?
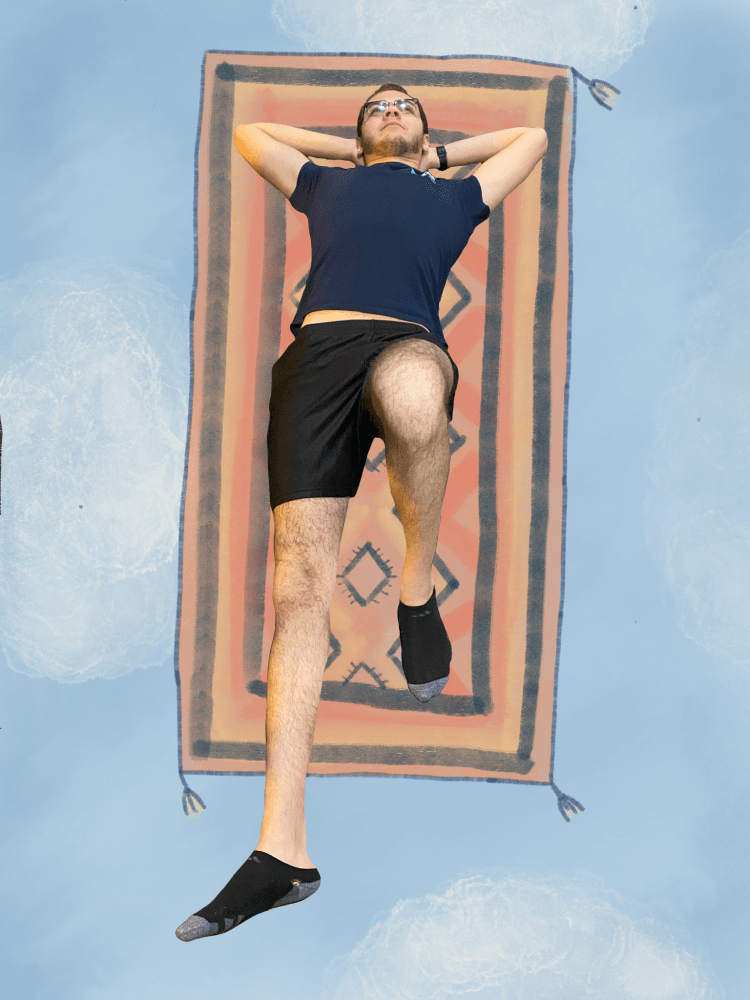
Essential Question: How can I take high quality photos that will enhance my project and help me reach the goal of having a high level of craftsmanship?
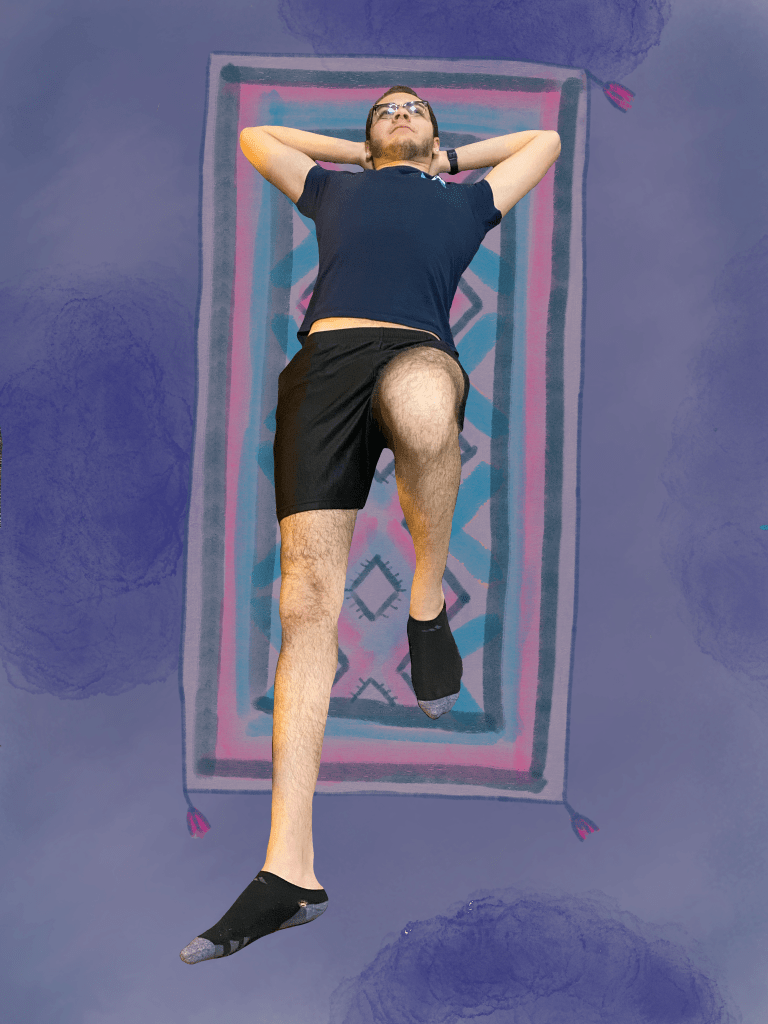
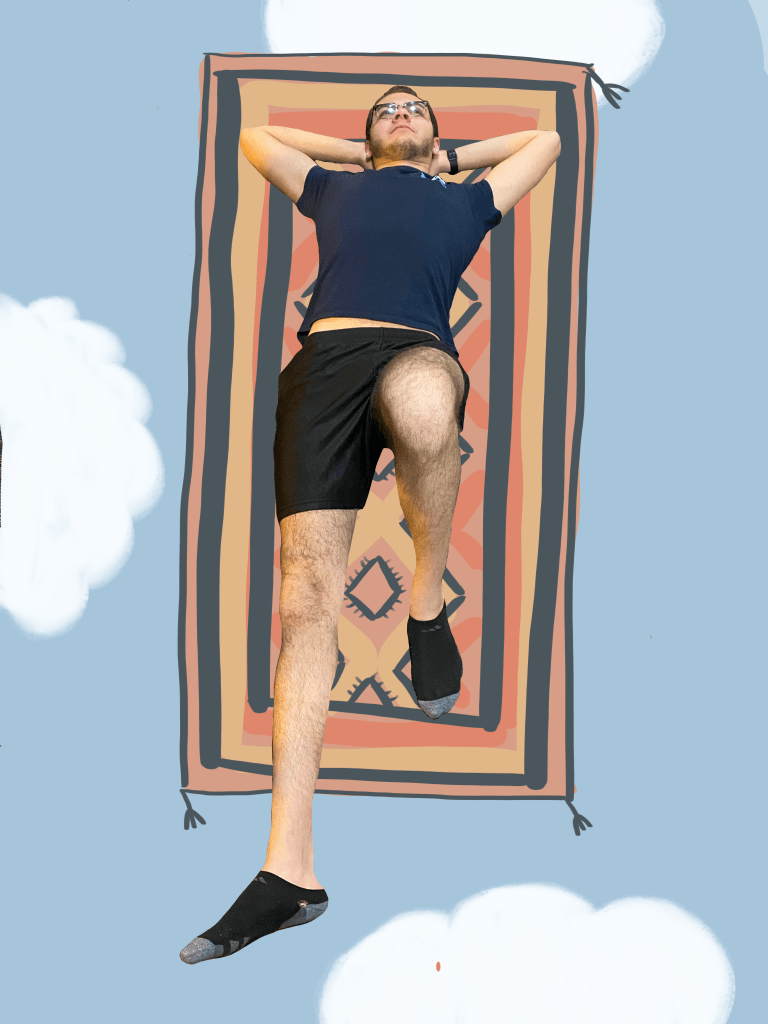
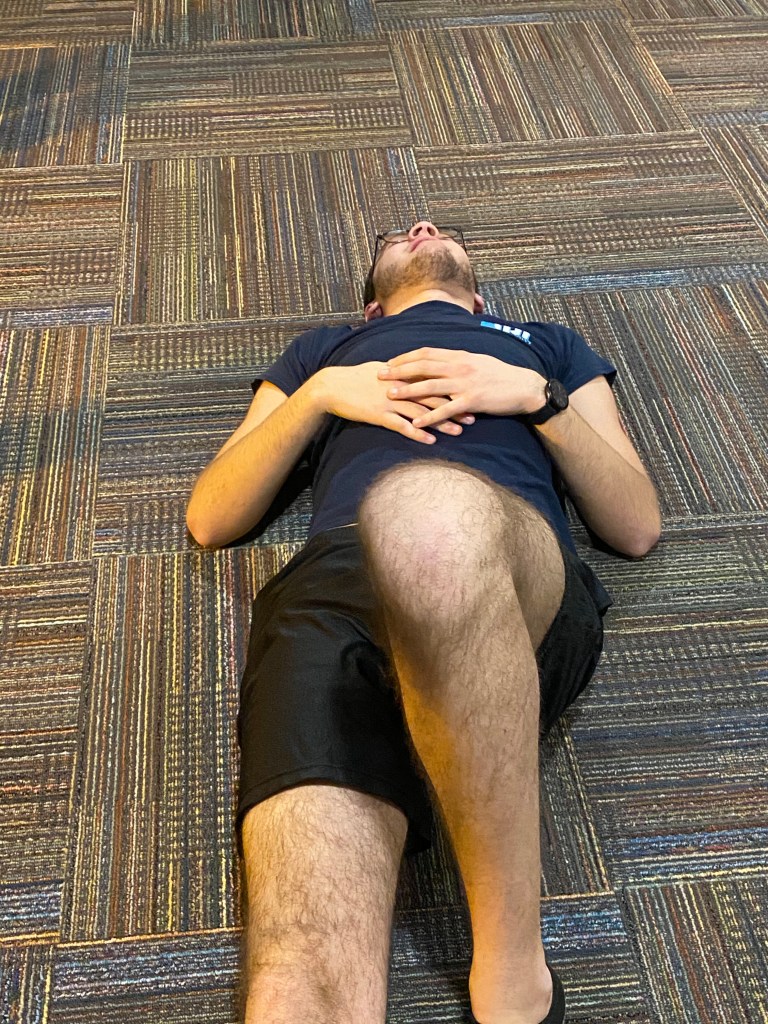
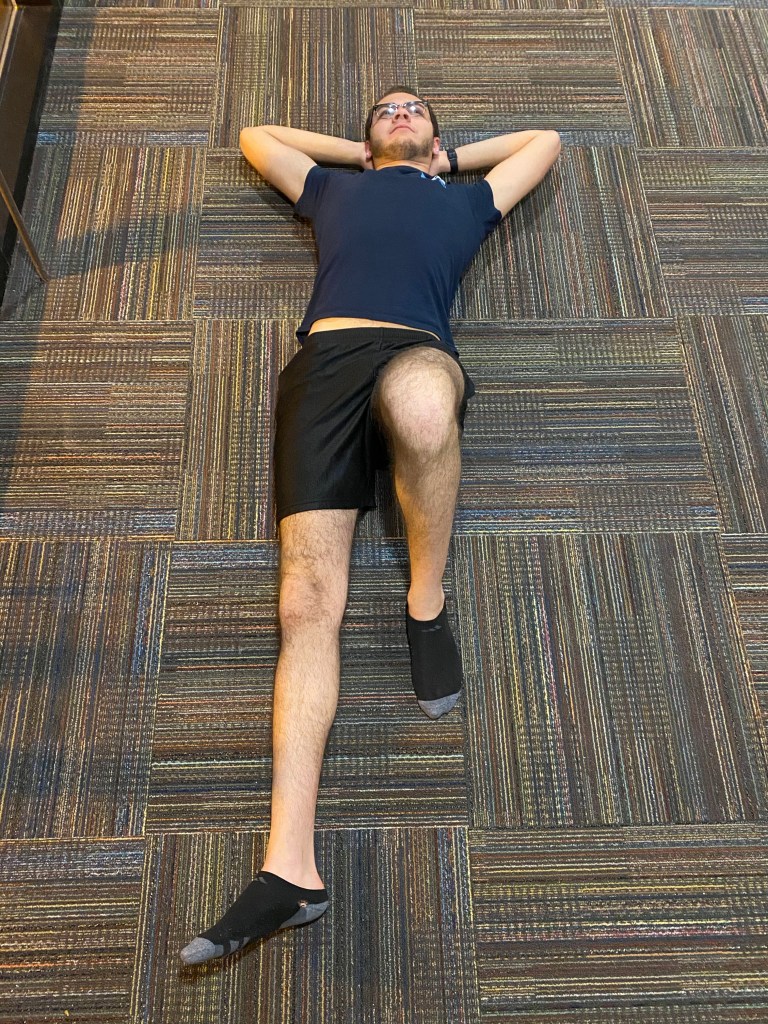
Today we will take photos for our Illustrative Photography project of either ourselves or our friend. The model will pose similarly to how they did in our sketch. If needed, we will then use Photoshop to edit the background of our image to create a solid background to successfully draw on top of. When we are finished, we will bring our final photo into Procreate on the iPad and begin our illustration
Photography Examples:
Using Procreate:
Today we will:
Take photos of either ourselves or a friend in the pose we need for our illustration
Use Photoshop to edit the background of the image to make sure we have a nice surface to draw on top of.
When our final photo is ready, we will bring our photo into procreate on the iPad and begin our illustration.
Create a blog post showing both your finished photo, as well as your progress in Photoshop and/or Procreate. Be sure to answer the following questions:
Why did you choose the photo you chose?
How did you use Photoshop to enhance your photo?
How will you continue to create your illustration in Procreate?
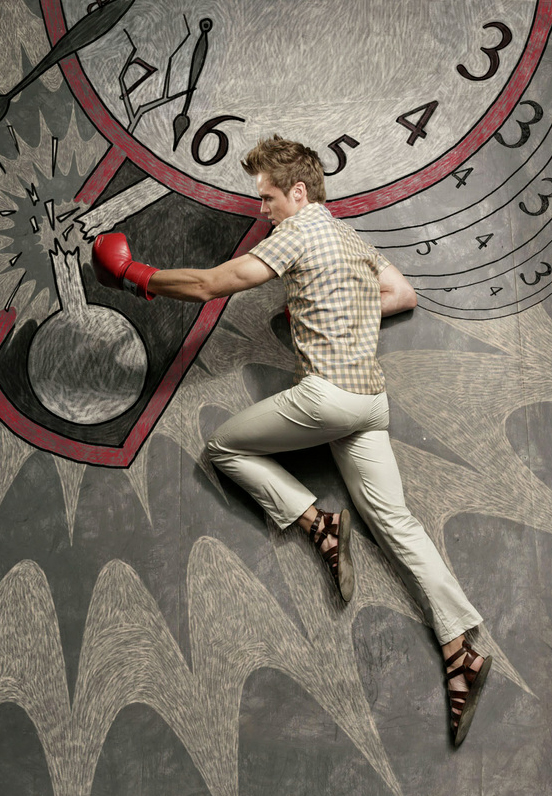
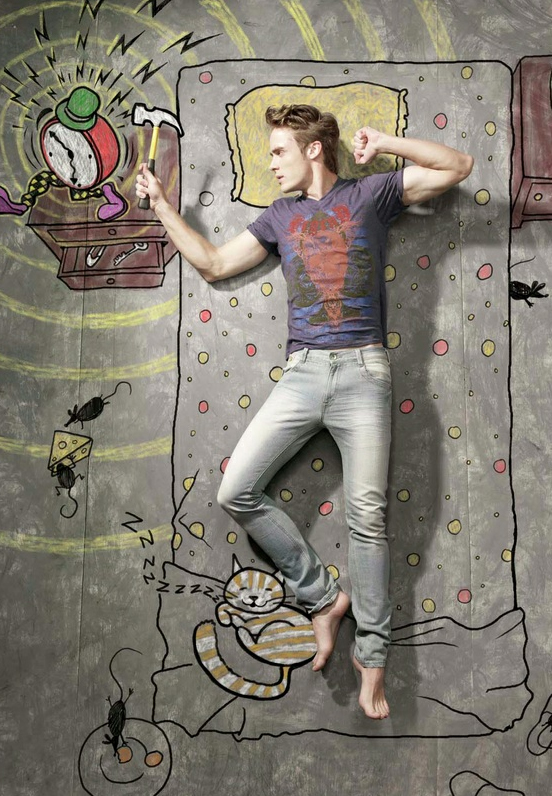
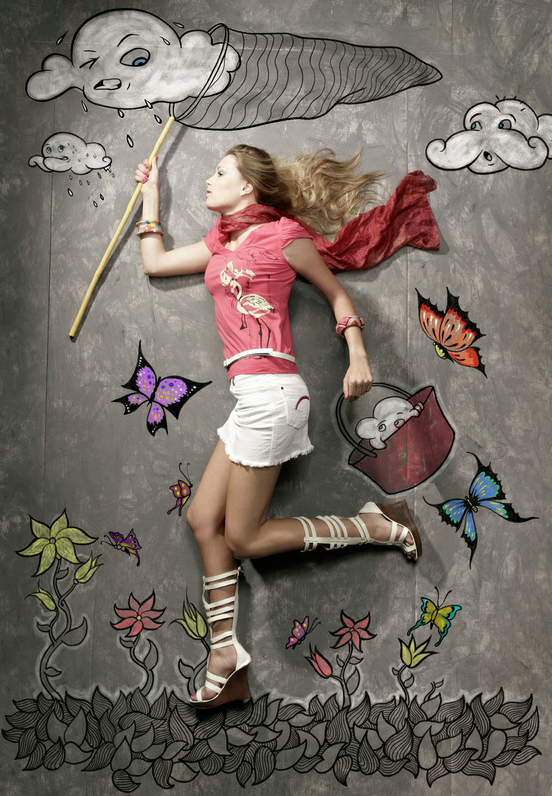
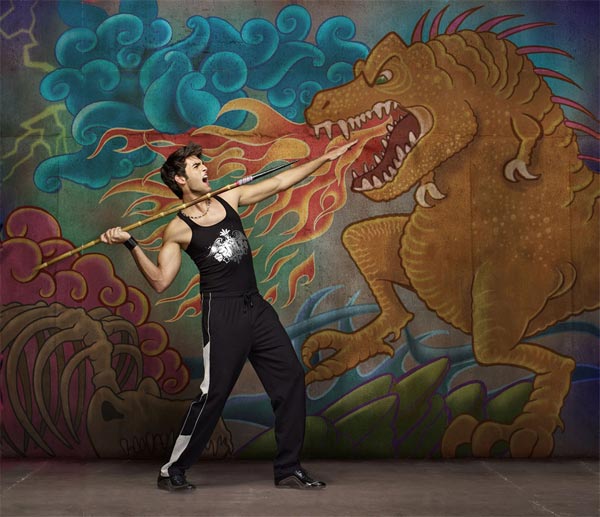
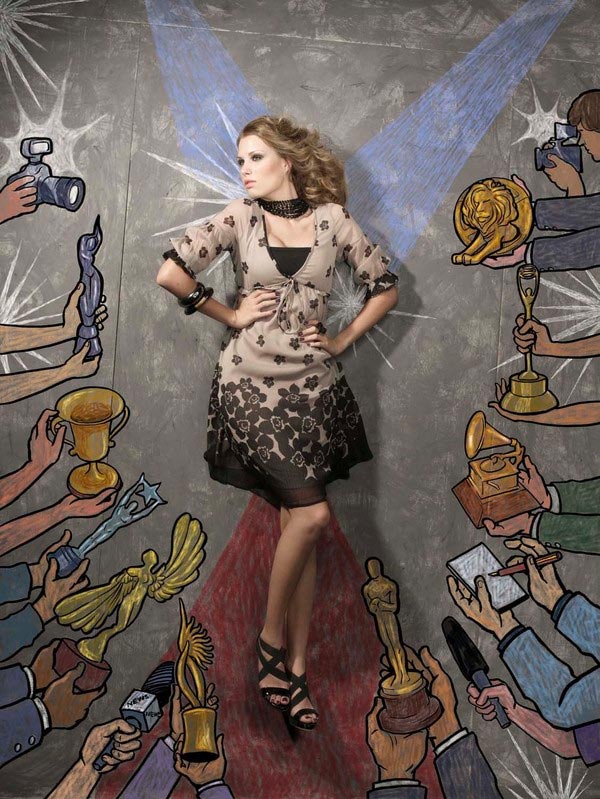
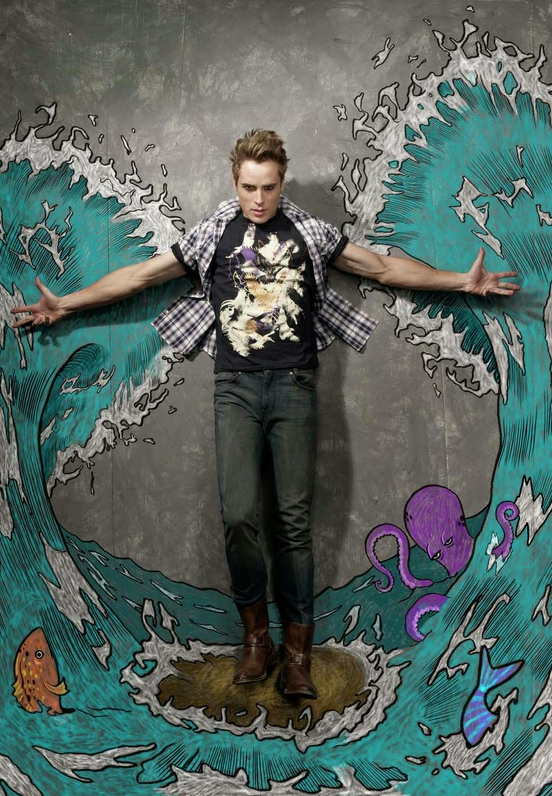
Today’s essential question: How can I create an illustration that combines both photography and drawings to tell a story?
Today we will be introduced to our next project. We will talk about how to tell stories with our art and how to give them meaning. We will also look at the work of Nithin Rao Kumblekar and how he combines photography with illustration to create his own narratives.
Nithin Rao Kumblekar
Sketches
When drawing your sketch make sure you plan out all aspects of your design. Be thinking about:
How you will set up your photograph
What pose will you have your model in
What are some of the objects/character that you will be drawing in your illustration
Project Requirements:
An illustration that tells a story of conveys a message in some way
A Photograph of either you or a friend
Good lighting
A solid background. You can bring in your own background if you would like to
An interesting pose or action
75% of your photo should be drawn on
Incorporate the elements and principles of design
High level of craftsmanship
Today We Will:
Look at the work of Nithin Rao Kumblekar
Sketch out your ideas for your project
Write a blog post with your sketch and answering the following questions:
What story do you want to tell?
What are your plans for how you want your photograph to look?
How will you incorporate the principles of designs
Once your video file is exported, add it to the “Final Projects” folder in the “Digital Tattoo” folder on Google Drive, that I shared with you
You also need to upload your final video to Youtube, and post that on your blog.
One of the computers will be set aside to upload videos to Youtube since it is block on some.
Today we will:
Finish out Digital Tattoo Project. The project will be:
At least 10 seconds long
Elements of Art including a unified color scheme, differences in line weight, contrast, and a balance of positive and negative space.
High quality craftsmanship
Feels realistic, like the tattoo is actually on our arm. This includes the dots being edited out using mask tracking
A blog post that includes our final video uploaded to Youtube & an artist statement that’s at least 5 seconds long and that answers the following questions:
What aspect of the project do you feel you did well on? What was your favorite part?
What’s an area that you feel you could improve or continue to work on?
How do you feel your project connects back to your chosen artist?
If you were to do this project again what do you wish you’d done differently? How can I as your teacher improve the project?
Correct perspective – make sure that your tattoo is being placed onto your arm correctly. This will help your tattoo look like it’s actually on skin vs just floating.
Transparency – adding places of transparency in your design will make it look realistic.
Opacity – turning down the opacity a little would also help the tattoo look like its on skin
Smooth Animation – making sure everything is animated smoothly and there’s no animation that feels unnatural will help your animation feel realistic.
Today we will:
Learn how to use mask tracking to hide the dots we drew on our arms. This will help make our tattoo designs seem more realistic.
Continue working on our project
Create a blog post updating on our progress with our project and answering the following questions:
Where are you in working on your project?
What are some steps you’re going to take towards completing your project?
What are some areas you’re having trouble with? Is there anything you’d want review or any questions you have?
How do you plan to make your tattoo look realistic?
Essential Question: How can I create a good video to best display my tattoo Illustration? What does a good video look like compared to a bad one?
Today we will discuss what makes a good video and how we can incorporate those practices when we film our own. We will draw dots on our arms and film videos one iPads. These videos will be what we project our tattoos onto in our project.
Project Reminders:
10-15 seconds long
High quality craftsmanship (good quality video and animation)
Before starting your project, create a new folder on your desktop so your project doesn’t get corrupted. In your folder you should have:
You footage you take today
A png of your tattoo design
The AfterEffects file you create for your project
Video Examples:
Horizontal footage instead of vertical
Good lighting
Make sure all of the dots are in frame and your arm is moving slowly
Make sure the only thing in your background in the colored paper
make sure the floor, table, etc. are not in frame
Today we will…
Upload the motion tracking tutorial we did last class into the Google Drive folder that was shared with you.
You upload a video file and now the AfterEffects file
Make sure your name is on your file
Compare video examples and discuss how we can incorporate good practices to create a video with a high level of craftsmanship
Draw dots on our arms (if you have an issue with this you’re welcome to use a friend or Ms. Manhardt instead)
Upload our videos in the correct folder on Google Drive
Make a blog post with 3 screenshots of your work and answering the following questions:
What is the plan and next steps for you to complete your project?
Why is the video you filmed one you want to use?
How did you incorporate different techniques when filming to successfully create a high quality video?
If you have finished your video but still need to finish either your tattoo illustration or the AfterEffects tutorial make sure that’s also completed by the end of class
Essential Question: How can I use the skills I’ve learned in the mini lesson when creating my tattoo project?
Today we will do the AfterEffects tutorial to learn skills that we will need to complete our motion tracking in our tattoo project. At the end of class, upload your tutorial to your blog.
Motion Tracking Tutorial
Open Adobe After Effects on your computer and download these step by step handouts that will help you set up your file as well as teach you to motion track.
Essential Question: What techniques can I use to successfully translate my sketch to a digital image using Illustrator? What tools does the program have to help achieve the level of craftsmanship I want?
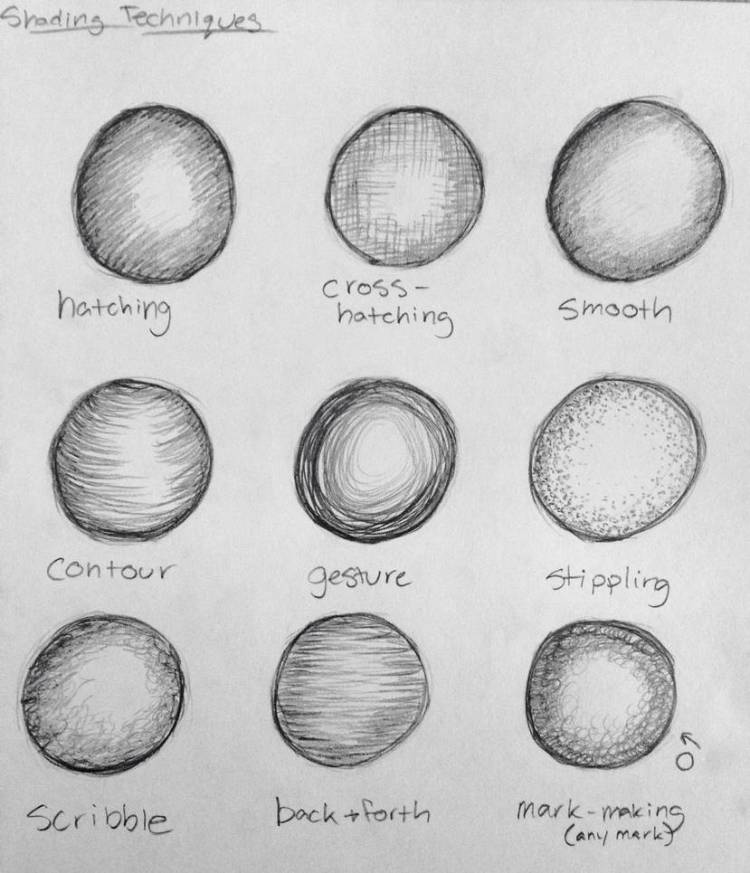
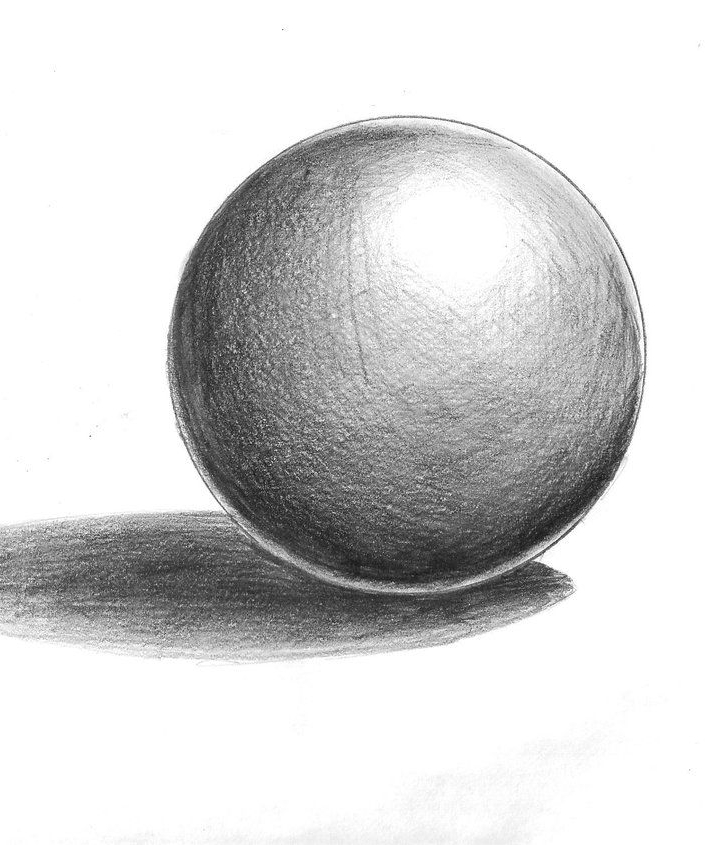
Today we will continue to create digital versions of our tattoo sketches in Illustrator. We will talk about craftsmanship and how to achieve that using both the pen tool and the smooth tool. We will also discuss different shading techniques that we can use to add dimension to our illustrations.
Project Reminders:
5×10, you choose the orientation
Only use the Pen Tool
Limited color scheme
2/3 colors max
Think about how this will look on your skin
Shading Techniques:
In Illustrator and vector images, there are different ways you can create dimension that build off of traditional shading techniques you already know how to use when drawing.
Line or different block/shapes can add dimension to our projects similar to how we would create them in pencil drawings.
Smooth Tool
A tool that will help you achieve a higher level of craftsmanship is the smooth tool. The smooth tool will allow you to smooth the appearance of your lines/paths by removing extra anchor points.
What’s the difference in these two lines?
To use the smooth tool, select the line/path you want to smooth.
Select the smooth tool but press and holding the shaper tool until a drop down menu will appear with the smooth tool.
Draw over the points on the path in the area you want to smooth.
Today we will:
Discuss the different ways we can add shading in Photoshop.
Talk about what a good color scheme looks like
Learn about the pen tool and how it can improve our projects.
Continue to sketch out our tattoo designs in Illustrator using a 5×10 artboard.
Make a blog post that answers the following questions:
Have you used the smooth tool? If so, how has it improved your design?
What is your plan for color? Will you be using it and what is the color scheme?
What is your plan for how you are you going to finish your design before we start animating?